
This is a cute 10 Apples Up on Top project I pulled from my files as a Kindergarten teacher. The kids LOVED this activity. Not only is the story a cute one this project allows children to practice counting, number writing, and number sequencing. Landon had fun with this too – so it’s totally modifiable to the developmental level of your child depending on the amount of work you do for prepping it versus the amount you let your child do with your guidance.
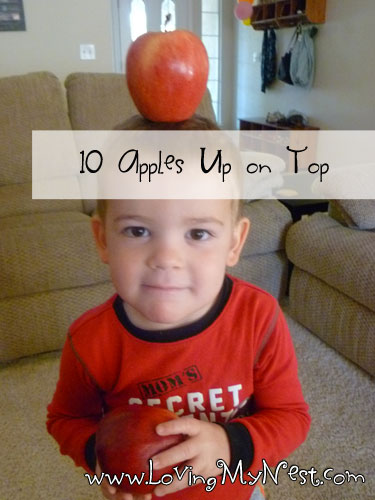
We started by remembering what happened in the story. I asked Landon if he thought he could balance 10 apples on his head. He thought he could.

The first few times he tried to get the apple up there it fell. I then helped him place it and balance it and we got 1 to stay at least long enough to take a picture to prove it!

Would 2 balance? He didn’t think so after all the trouble it was to just get 1. He was right. Riley was awake during this project so he had to get in on the apple balancing action:

Really all he wanted was a snack, and had fun batting the apple around like a ball on the ground.

I digress… Once we figured 1 apple was all we were going to get, we went over to do the project.
10 Apples Up On Top
10 Apples Up On Top Book (by Theo LeSieg)
Printable
Red paint/crayon/marker (whatever you’re in the mood for!)
First read the story. It’s best if you read it several times over a few days so they get the connection with this project. You can do the whole balancing apples on your child’s head. It’s really rather fun. Then color or paint the apples red (or yellow or green, or purple if that’s what float’s your child’s boat!). Depending on your child’s math and fine motor development write or have them write the numbers 1 – 10 on each apple (one number per apple) and cut them out. Cut a piece of paper in half long ways (hot dog style) and glue them to make one long piece of paper. On the bottom have your child draw a picture of their head (you could also take a picture and cut their head out and glue it on).

Then sequence the apples and glue them on in numerical order.

You’ll need to cut and glue more half pieces of paper as they glue to make it long enough. (used 3 – 1/2 pieces total) I included the little writing piece that I had my students do, if your child is able to write their name allow them to fill it in – if not write it for them, spelling it out loud while they watch – that’s how they learn! You can glue that piece to the top or the bottom. I didn’t get a picture with ours glued on – but we attached it to the bottom.
